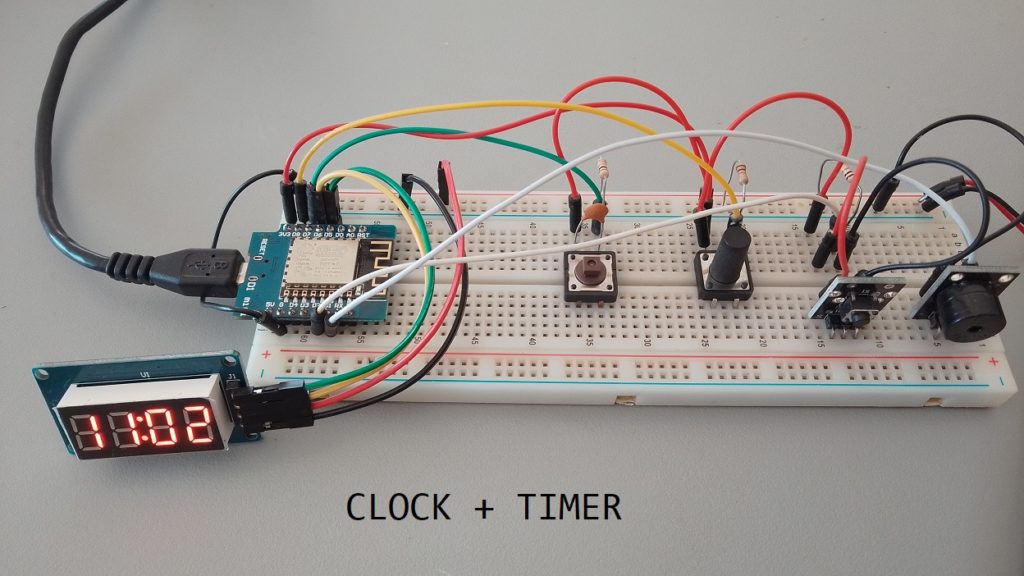
We’ll develop a digital clock and timer using TM1637 Display and ESP8266. This will be a fun and interactive way of learning how a digital timer can be built using simple components and code. Let’s get started! It isn’t perfect, it is a mere experiment.
Introduction
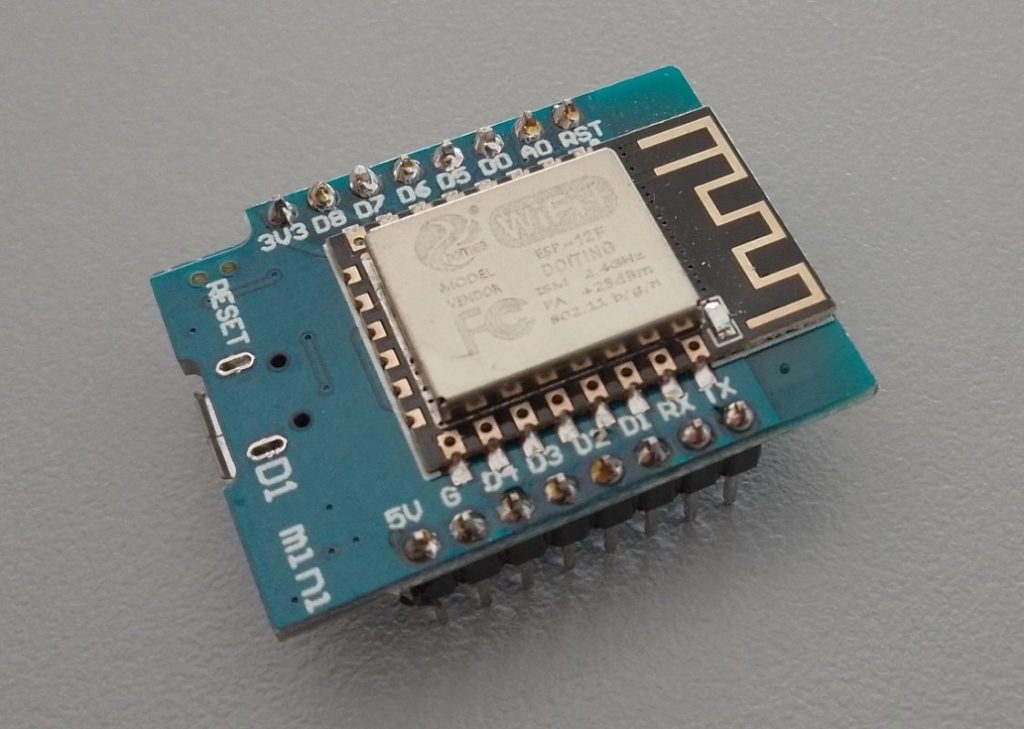
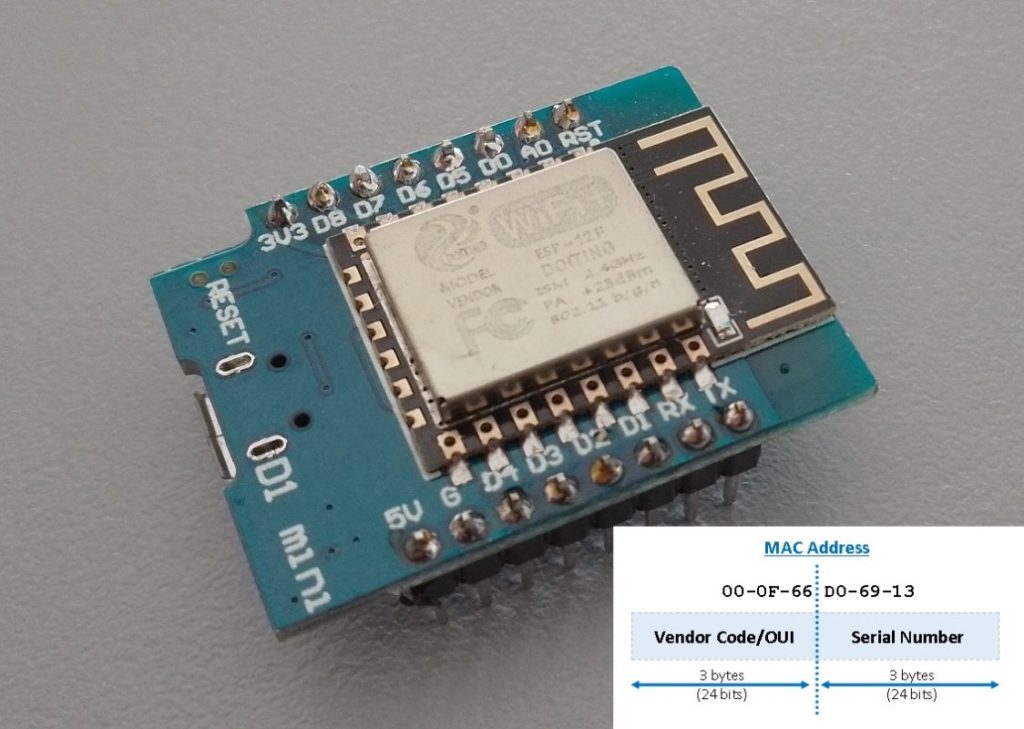
To create this setup, we are using the ESP8266 WiFi module, which is a low-cost Wi-Fi microchip with full TCP/IP stack and MCU capability.
TM1637Display is the library we use to control the 4-digit 7-segment display module from an Arduino. This is the display we use to represent the digital clock and timer.
To keep this clock synchronized in real-time, we use the NTPClient library. NTP (Network Time Protocol) is a protocol that synchronizes your computer’s time with that of a software server near you.
Materials Needed
Here are the materials you’ll need for a digital clock and timer with TM1637 and ESP8266:
- ESP8266 Development Board (such as NodeMCU or Wemos D1 Mini) (Affiliate) – Buy on AliExpress
- TM1637 display module (Affiliate) – Buy on AliExpress
- KY-006 Buzzer (Affiliate) – Buy on AliExpress
- Breadboard and jumper wires (Affiliate) – Buy on AliExpress
- 3 – Push Buttons (for incrementing time, starting, and switching between the timer and the clock)
- 3 – 10K Ohm Resistors
- 2 – 10 nF Capacitors (103 Code) to help with the Debouncing of some of the buttons, that is, the removing of unwanted input noise. (OPTIONAL)
Make sure to install/add the necessary Arduino libraries: TM1637Display, ESP8266WiFi, WiFiUDP, and NTPClient.
Wiring Instruction
The ESP8266 WiFi module can be directly connected to the TM1637 display. Here is the basic wiring instruction:
- CLK_PIN of the display should be connected to the D5 (GPIO14) of the ESP8266.
- DIO_PIN of the display is connected to the D6 (GPIO12) of ESP8266.
- Button for incrementing time, defined by BUTTON_INC_PIN, should be connected to D7 (GPIO13).
- Button for selecting and starting the timer, defined by BUTTON_SELECT_PIN, should be connected to D8 (GPIO15).
- Button used for the switching between the timer and the clock to pin D2 on the ESP8266
- Buzzer can be connected to any GPIO, in this code it’s connected to D1 (GPIO5).
All the necessary power (VCC) and ground (GND) connections should be made appropriately.
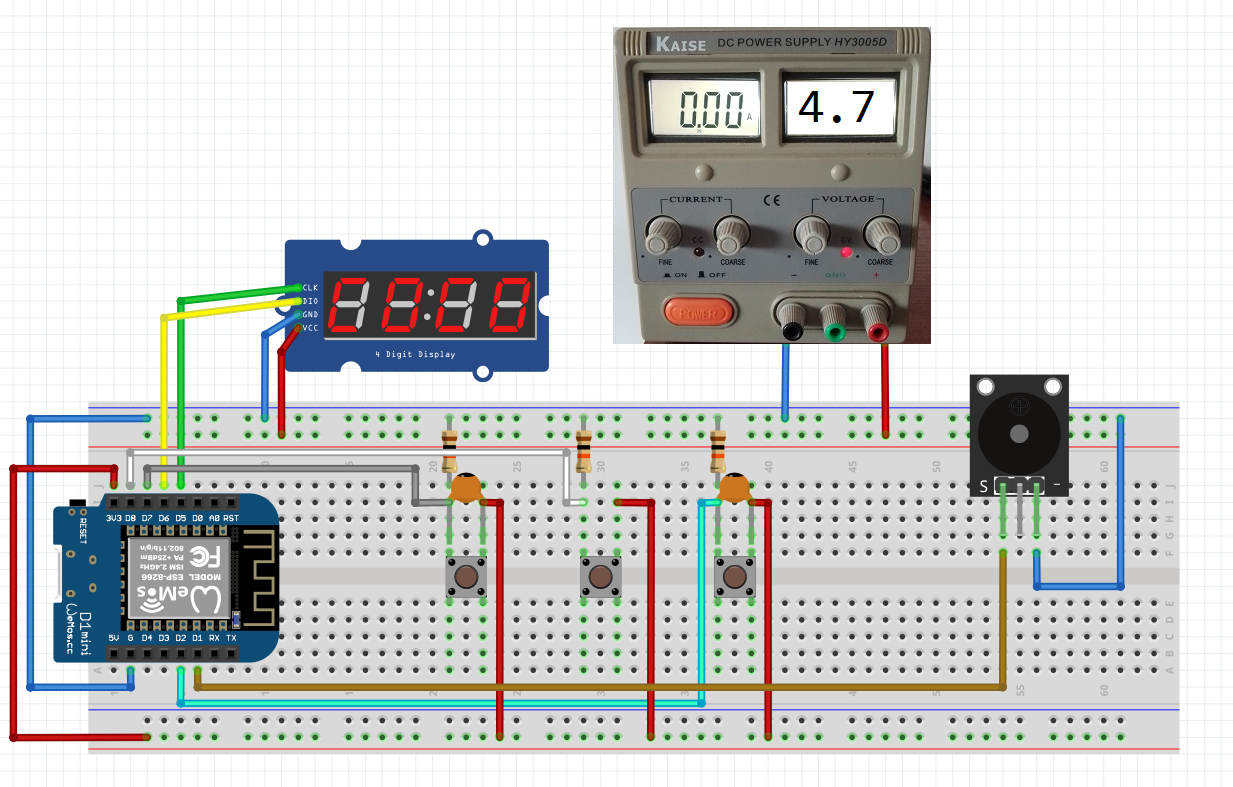
Circuit Diagram
- Connect the TM1637 Display:
- Connect the CLK (Clock) pin of the TM1637 display to pin D5 on the ESP8266.
- Connect the DIO (Data Input/Output) pin of the TM1637 display to pin D6 on the ESP8266.
- Connect VCC to a +4.7V External Regulated Power Supply (or to 5V on the Esp8266 <- not recommended because this Wemos D1 Mini is only 3.3v logic tolerant, we can see this on the tm1637 Datasheet that the logic value is 0.7*VCC witch give us approx. +3.3v of Logic Level Voltage and this is OK if we don´t want to burn the Little Guy)
- Connect the GND pin of the TM1637 to the GND pin of the ESP8266/Global GND.
- Connect the Push Buttons (Better to follow the diagram bellow):
- Connect one terminal of the button used for incrementing time to pin D7 on the ESP8266.
- Connect one terminal of the button used for selecting and starting the timer to pin D8 on the ESP8266.
- Connect one terminal of the button used for the switching between the timer and the clock to pin D2 on the ESP8266.
- Connect the other terminals of these buttons to the ground (GND) on the ESP8266.
- Connect the Buzzer (Optional):
- If you’re using a buzzer for audio alerts, connect one terminal of the buzzer to pin D1 on the ESP8266 .
- Connect the other terminal of the buzzer to GND on the ESP8266.
- Power Supply (Better to follow the diagram bellow):
- Connect the 3.3V or 4.7 power supply (depending on your components) to the respective power pins on the ESP8266 (usually labeled as 3V3 or 5V).
- Connect the ground (GND) from your power supply to a ground (GND) pin on the ESP8266.
Installing Libraries
To control the TM1637 display module, we need to install the “TM1637Display” library.
- Open the Arduino IDE, go to “Sketch” → “Include Library” → “Manage Libraries” and search for “TM1637”.
- Install the library authored by “Avishay” latest version.
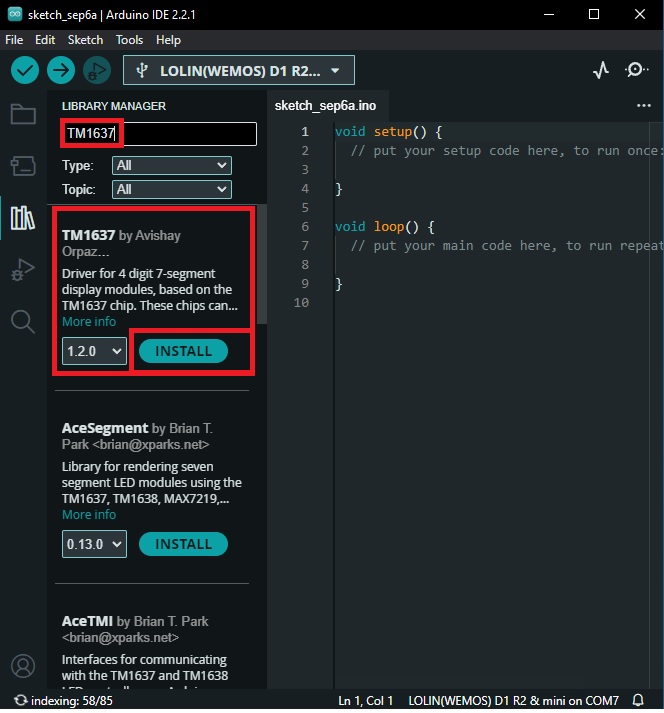
- NTPClient library for Arduino. You can install it via the Arduino Library Manager.

The Code
#include <TM1637Display.h>
#include <NTPClient.h>
#include <ESP8266WiFi.h>
#include <WiFiUdp.h>
// Replace with your network credentials
const char* ssid = "YOUR SSD";
const char* password = "YOUR PASSWORD";
// Define the NTP client and server details
WiFiUDP ntpUDP;
NTPClient timeClient(ntpUDP, "pool.ntp.org");
// Pins for TM1637 display
#define CLK_PIN 14            // (D5)
#define DIO_PIN 12            // (D6)
#define BUTTON_INC_PIN 13     // Button to increment time
#define BUTTON_SELECT_PIN 15  // Button to select and start timer
#define BUZZER_PIN 5          // Digital pin connected to the buzzer (e.g., D7)
const int buttonPin = 4;         // D2 on Wemos D1 Mini corresponds to GPIO4
volatile bool clockMode = true;  // Start in clock mode
volatile bool stateChangedFlag = false;
#define MAX_MINUTES 60
#define BRIGHTNESS_LEVEL 0x0A
int selectedMinutes = 1;
int selectedSeconds = 0;
unsigned long startTime = 0;
bool timerRunning = false;
bool lastButtonIncState = LOW;
bool lastButtonSelectState = LOW;
int lastDisplayValue = -1;
// Create a TM1637Display object
TM1637Display display(CLK_PIN, DIO_PIN);
unsigned long lastDebounceTime = 0;
unsigned long debounceDelay = 70;  // Adjust this delay as needed
void ICACHE_RAM_ATTR toggleMode() {
// Check if enough time has passed since the last button press
if ((millis() - lastDebounceTime) > debounceDelay) {
clockMode = !clockMode;
stateChangedFlag = true;
lastDebounceTime = millis();
if (!clockMode) {
// When switching to timer mode, reset the timer to 1 minute (1:00)
selectedMinutes = 1;
selectedSeconds = 0;
timerRunning = false; // Reset the timer state
stateChangedFlag = true;  // Force a state change to update the display
}
}
}
void setup() {
Serial.begin(115200);
display.setBrightness(BRIGHTNESS_LEVEL);
pinMode(BUTTON_INC_PIN, INPUT_PULLUP);
pinMode(BUTTON_SELECT_PIN, INPUT_PULLUP);
pinMode(buttonPin, INPUT_PULLUP);
attachInterrupt(digitalPinToInterrupt(buttonPin), toggleMode, FALLING);
// Connect to Wi-Fi
Serial.println("Connecting to WiFi...");
WiFi.begin(ssid, password);
while (WiFi.status() != WL_CONNECTED) {
delay(1000);
Serial.println("Connecting to WiFi...");
}
Serial.println("Connected to WiFi");
// Initialize the NTP client and get the time
timeClient.begin();
timeClient.setTimeOffset(3600);  // Set your timezone offset in seconds (e.g., GMT+1)
// Initialize the display
display.setBrightness(0x4);  // Adjust the brightness (0x00 to 0x0f)
Serial.println("Clock setup complete");
// Initialize the buzzer pin as an OUTPUT
pinMode(BUZZER_PIN, OUTPUT);
noTone(BUZZER_PIN); // Ensure the buzzer is initially off
}
void loop() {
if (stateChangedFlag) {
if (clockMode) {
Serial.println("Switched to Clock Mode");
// Update the display with the current time when switching to clock mode
updateClockDisplay();
} else {
Serial.println("Switched to Timer Mode");
// Display "1:00" when switching to timer mode
display.showNumberDecEx(100, 0b01000000, false, 4);
}
stateChangedFlag = false;
}
// Rest of your code
if (clockMode) {
// Update the NTP client to get the current time
timeClient.update();
// Get the current time
int hours = timeClient.getHours();
int minutes = timeClient.getMinutes();
// Display the time on the TM1637 display
display.showNumberDecEx((hours * 100) + minutes, 0b01000000, true);
displayTime(60);
// Print the time to Serial for debugging
Serial.print("Time: ");
Serial.print(hours);
Serial.print(":");
Serial.println(minutes);
delay(1000);  // Update every second
} else {
bool buttonIncState = digitalRead(BUTTON_INC_PIN);
bool buttonSelectState = digitalRead(BUTTON_SELECT_PIN);
if (buttonIncState == HIGH && lastButtonIncState == LOW && !timerRunning) {
incrementSelectedMinutes();
Serial.println("Increment button pressed.");
}
if (buttonSelectState == HIGH && lastButtonSelectState == LOW && !timerRunning) {
startTimer();
Serial.println("Select button pressed. Timer started.");
}
lastButtonIncState = buttonIncState;
lastButtonSelectState = buttonSelectState;
if (timerRunning) {
unsigned long currentTime = millis();
unsigned long elapsedTime = (currentTime - startTime) / 1000;
if (elapsedTime <= (selectedMinutes * 60 + selectedSeconds)) {
int remainingTime = (selectedMinutes * 60 + selectedSeconds) - elapsedTime;
displayTime(remainingTime);
// Check if the timer has reached zero
if (remainingTime == 0) {
activateBuzzer();
} else {
// Turn off the buzzer
deactivateBuzzer();
}
} else {
displayTime(0);
timerRunning = false;
deactivateBuzzer(); // Turn off the buzzer when the timer finishes
Serial.println("Timer finished.");
}
}
}
}
void incrementSelectedMinutes() {
selectedMinutes++;
if (selectedMinutes > MAX_MINUTES) {
selectedMinutes = MAX_MINUTES;
}
displayTime(selectedMinutes * 60 + selectedSeconds);
}
void startTimer() {
startTime = millis();
timerRunning = true;
}
int formatTime(int timeInSeconds) {
int minutes = timeInSeconds / 60;
int seconds = timeInSeconds % 60;
return minutes * 100 + seconds;
}
void displayTime(int timeInSeconds) {
int minutes = timeInSeconds / 60;
int seconds = timeInSeconds % 60;
// Check if the remaining time is zero
if (minutes == 0 && seconds == 0 && timerRunning) {
display.showNumberDecEx(100, 0b01000000, false, 4);  // Display "1:00" when the timer reaches zero
return;                                              // Exit the function early
}
// Format the time as "MM:SS"
int displayValue = minutes * 100 + seconds;
if (displayValue != lastDisplayValue) {
// Display the formatted time with a colon ":" separator
display.showNumberDecEx(displayValue, 0b01000000, false, 4);  // 0b01000000 is the colon symbol
lastDisplayValue = displayValue;
}
}
void updateClockDisplay() {
// Update the display with the current time when switching to clock mode
timeClient.update();
int hours = timeClient.getHours();
int minutes = timeClient.getMinutes();
display.showNumberDecEx((hours * 100) + minutes, 0b01000000, true);
}
void activateBuzzer() {
// Activate the buzzer
tone(BUZZER_PIN, 1000); // You can adjust the frequency as needed
}
void deactivateBuzzer() {
// Turn off the buzzer
noTone(BUZZER_PIN);
}
The code is organized as follows:
Global Variables and Constants:
The constants
ssid
and
password
are set to connect the ESP8266 module to your WiFi network. The
NTPClient
object
timeClient
is also initialized.
GPIO pins for the 7-segment display, buttons, and a buzzer are also defined here. Clock, timer, and button states are tracked through the
clockMode
,
timerRunning
,
stateChangedFlag
,
lastButtonIncState
, and
lastButtonSelectState
variables, among others.
Setup and Main Loop:
Within the
setup()
function, the WiFi connection is established, the NTP client is initialized, the display’s brightness is set, and the pins are initialized for the buttons and the buzzer.
The
loop()
function includes the primary logic to manage timer and clock modes, handle button presses, calculate elapsed time, and control the buzzer and display.
Functions:
A collection of helper functions are used to manage the timer and clock, such as:
-
toggleMode(): This function switches between clock mode and timer mode. -
incrementSelectedMinutes(): Increments the currently selected timer minutes. -
startTimer(): Starts the timer from the currently selected time. -
displayTime(int timeInSeconds): This function displays the current time or the remaining time in timer mode on the display. -
updateClockDisplay(): Updates the clock display with the current time from NTP client. -
activateBuzzer()anddeactivateBuzzer(): These functions control buzzer behaviour based on timer output.
This script toggles between a clock and a timer by pressing the button attached to the
buttonPin
. The timer duration can be incremented by pressing the button attached to the
BUTTON_INC_PIN
, and the timer can be started by pressing the button on the
BUTTON_SELECT_PIN
. When the timer reaches zero, a buzzer will sound.
In practice
Conclusion
By combing the capabilities of ESP8266, TM1637 display, and some clever programming, we have constructed a digital clock and a timer. This project is an excellent demonstration of the integration of different technologies to provide useful applications.
