
Quick Start Guide to the Sipeed MaixCAM Board
The Sipeed MaixCAM board is a development platform for machine vision and AI applications. This tutorial will guide you through the initial steps to get your MaixCAM up and running.
Acquiring the MaixCAM
To begin your journey with the MaixCAM, you’ll need to purchase the development board. It’s highly recommended to opt for a bundle that includes a least the essential accessories:
- MaixCAM development board kit (Affiliate):
- https://s.click.aliexpress.com/e/_DeAcqsH
- https://s.click.aliexpress.com/e/_DmeC0Dn
- https://s.click.aliexpress.com/e/_DeQvCZJ
These components will provide a comprehensive setup for development and testing:
- TF card (Bundle)
- Camera (Bundle)
- 2.3-inch touchscreen (Bundle)
- Protective case (Bundle)
- Type-C data cable (Separate)
Software needed
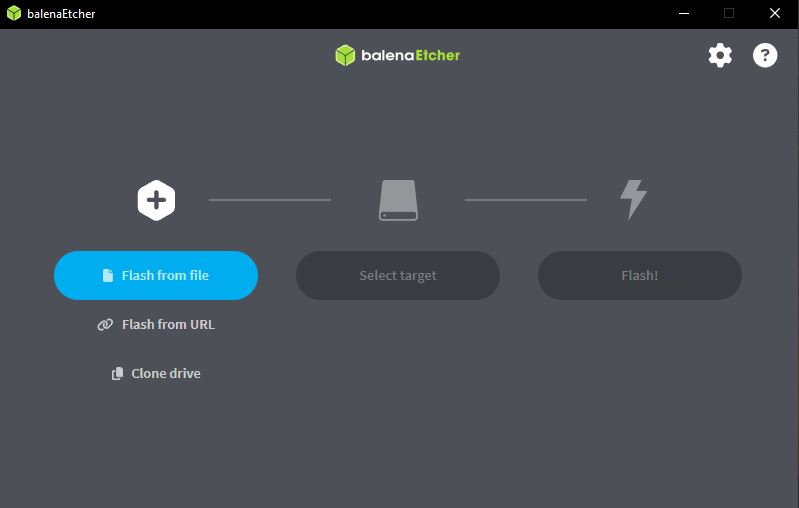
- Download and install – Etcher (Software to flash the TF Card-Link below)
- Download – Firmware image for the Maixcam (Link below)
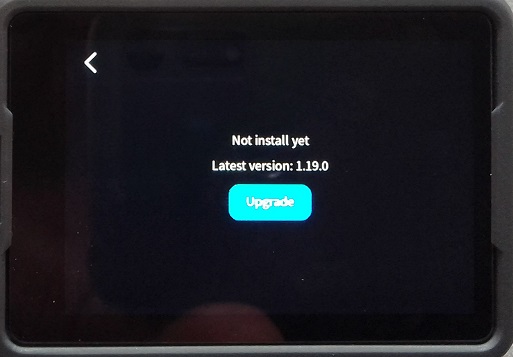
Checking the system info
Power up the Maixcam and go to SETINGS->DEVICE INFO to check if the update is needed (usually it is):
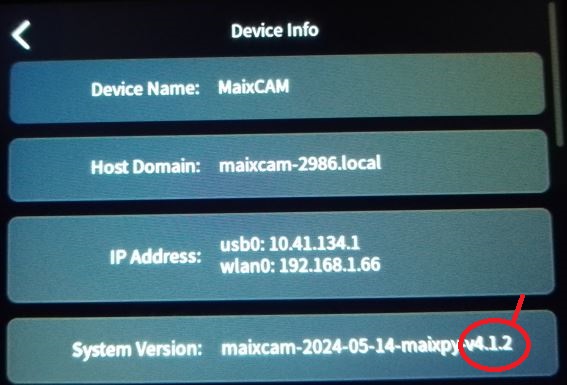
And compare it to the newest firmware available version on github:

Power Supply Considerations
Ensuring a stable power supply is crucial for the MaixCAM’s proper operation. The board requires a steady 5V 500mA power source. Inadequate power can lead to boot failures or operational instability. Be cautious when using computer USB ports, as they may not always provide consistent power, it is better to use a regulated power supply.
Preparing the TF Card
If your MaixCAM bundle included a pre-installed TF card, it likely contains the factory image. However, it’s advisable to update to the latest firmware for optimal performance. For those who purchased the board without a TF card, you’ll need to flash the system onto your own card. Either way, next we will update the firmware by flashing it to the TF card. This process, will update the system, uploading even new AI apps to the board system.
Initial Setup (Flashing new firmware)
- Download and install – Etcher (Software to flash the TF Card)
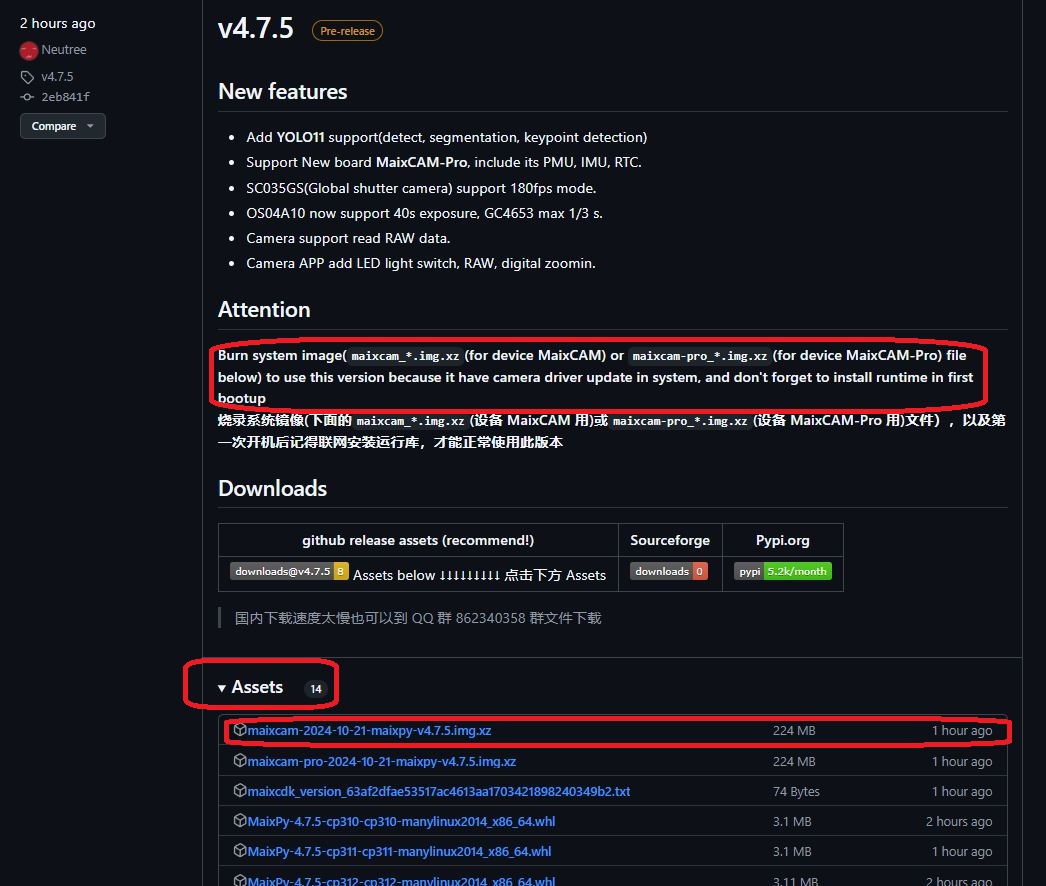
- Download newest firmware version from github – click on the assets tab to open it and select the image related to the board. In this case is the Maixcam not the pro.
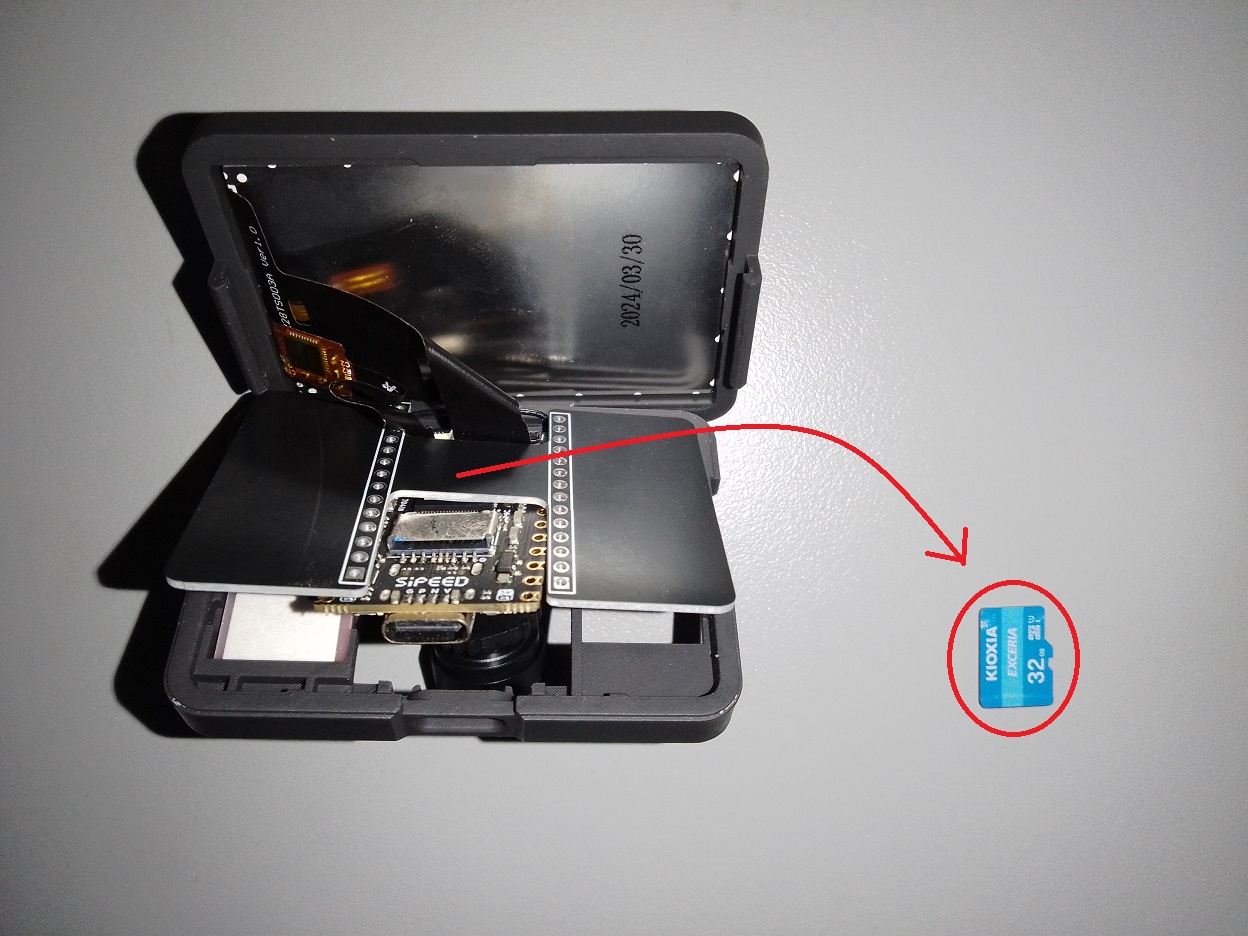
- Remove the TF Card from the board and insert it in a card reader: Carefully open the case and remove the TF card from the designated slot.
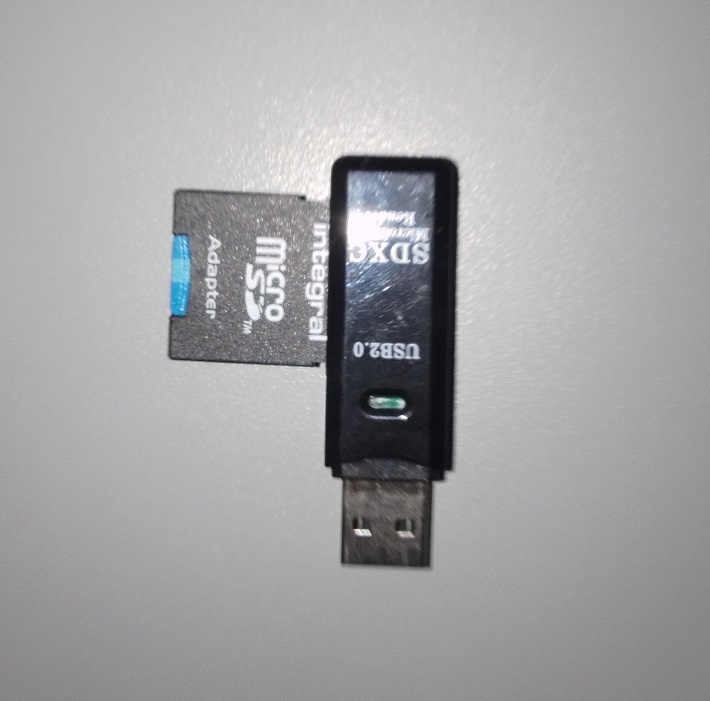
- Power on the card reader: Connect the card reader with the card to a USB port. IGNORE/CANCEL the boring errors – do not format the card!!.
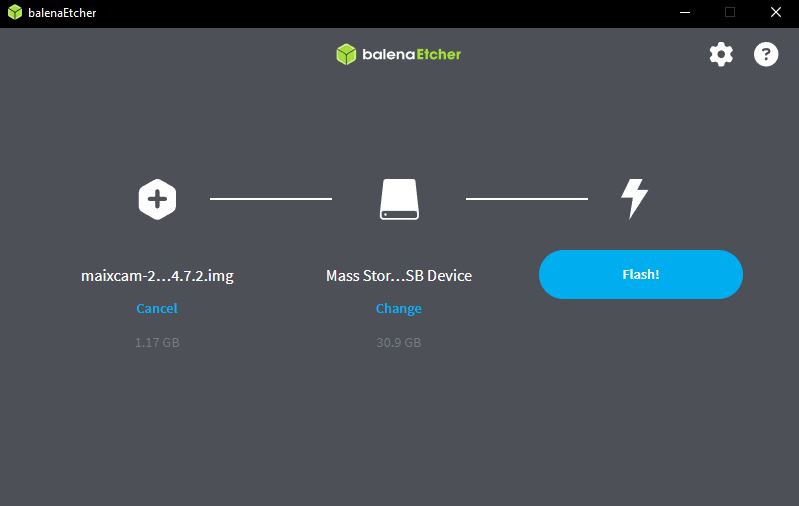
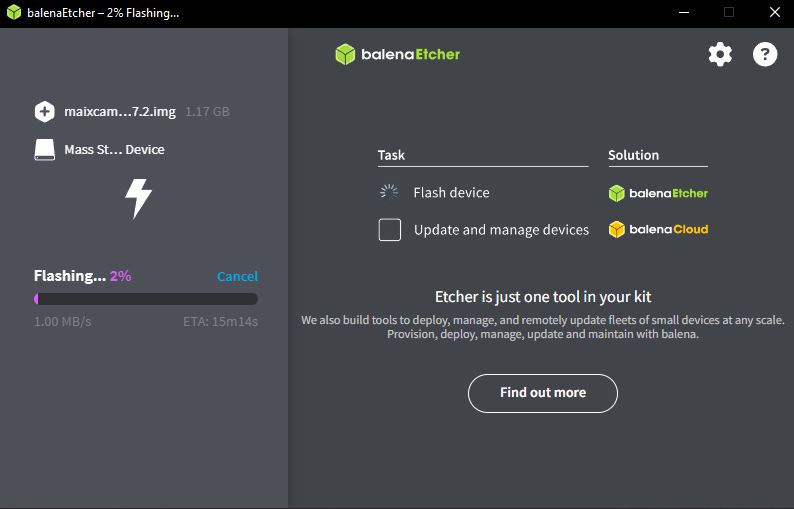
- Open “balenaEtcher” program. After the installation it should be available as a shortcut. Open it as admin. Select the image, select the drive to install and proceed with the installation. It will take a while, i suggest walk the dog or make a cup of coffee. IGNORE/CANCEL the boring errors – do not format the card!!
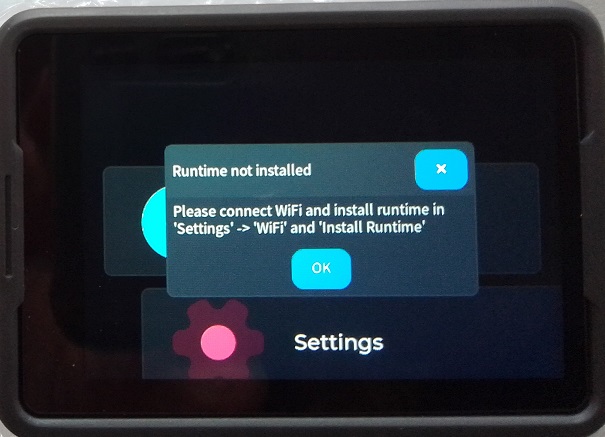
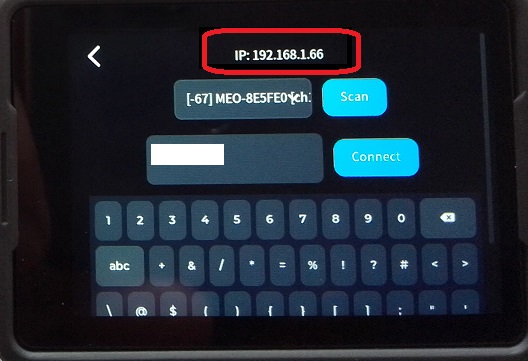
- If the flashing is successful, put back the card in the board carefully. Restart the board. It will display that is needed to install the runtime. First connect to the WIFI network and then install the runtime (IN SETTINGS). Check the IP address that was attributed to the board. This is important later when we install the MaixVision IDE.
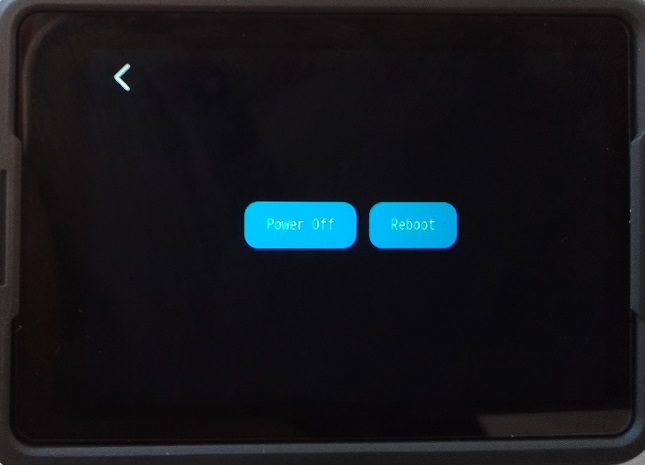
- Now, the board is ready, explore it and use the apps! One more thing–> important. The board should be power down correctly in order not to corrupt the system. The reset button is a NO NO because it can cause problems if the system is processing information internally. The safe way to power down the device is going to SETTINGS — > POWER —>> POWER OFF / REBOOT
Troubleshooting Display Issues
If you encounter problems with the display:
- Verify that you have a TF card inserted with the correct firmware.
- Ensure all cables, especially the screen and camera connections, are secure.
- If issues persist, consider updating to the latest system firmware.
Next Steps
With your MaixCAM board powered on and functioning, you’re ready to explore its capabilities. The MaixPy environment offers a range of features for machine vision and AI projects. Consider exploring the following areas:
- Familiarize yourself with the MaixPy API
- Experiment with basic image processing tasks
- Try out some pre-built machine learning models
Remember, the MaixCAM is a powerful tool for innovation in computer vision and embedded AI. As you become more comfortable with the basics, you’ll be able to tackle increasingly complex projects and applications.By following these initial steps, you’ll have your Sipeed MaixCAM board up and running, ready to embark on exciting development projects in the world of machine vision and AI.